Building a Deep Learning Camera with a Raspberry Pi and YOLO
Amazon has just announced DeepLens, a smart webcam that uses machine learning to detect objects, faces, and activities like playing a guitar on the camera itself. The DeepLens isn’t available yet, but the idea of a smart camera is exciting.
Imagine being able to use a camera that’s able to tell when you’re playing a guitar, or creating a new dance, or just learning new skateboard tricks. It could use the raw image data to tell if you landed a trick or not. Or if you’re doing a new dance routine, what the series of poses are, and how they fit to the music.
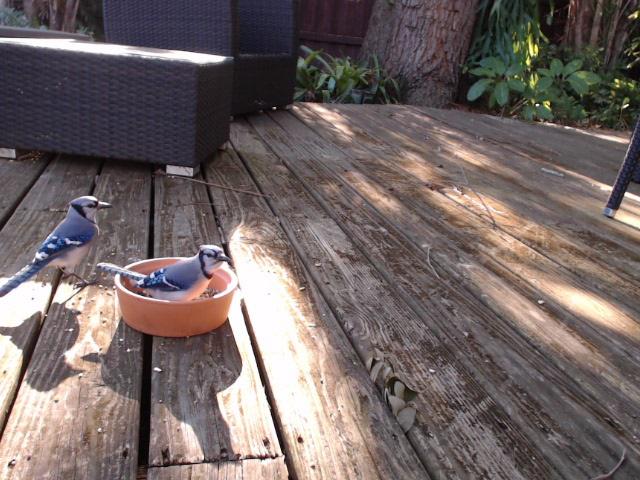
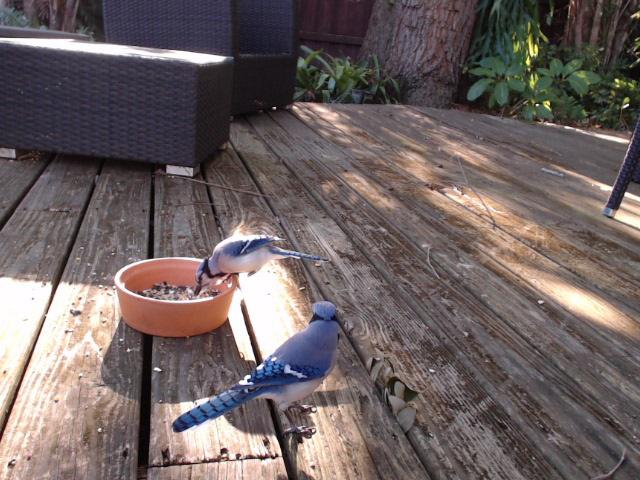
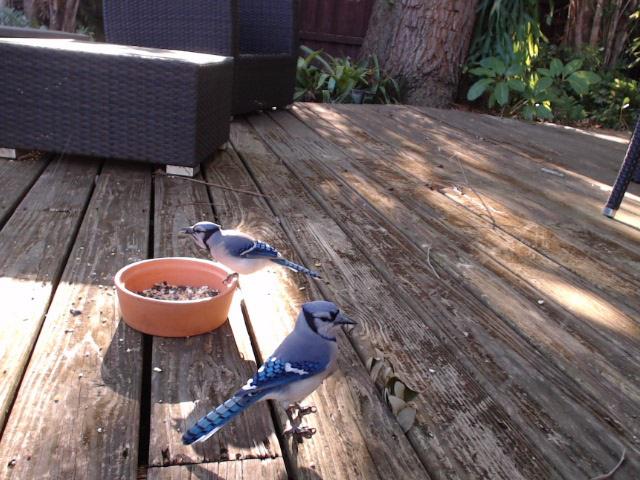
Today, we’ll build a deep learning camera that detects when there are birds present in the webcam image, and then saves a photo of the bird. The end result gives us images like this:
Deep learning cameras are the beginning of a whole new platform for machine learning computers.
The DeepLens has 100 GFlops of computational power available for inference, which is just the beginning of the computational power necessary for an interesting deep learning camera computer. In the future, these devices will get much more powerful, and allow for inferring hundreds of images a second.
But who wants to wait for the future?
Dumb Camera, Smart Inference
Instead of building a deep learning model into our camera, we’ll use a “dumb” camera computer at the edge (like a $9 Raspberry Pi), hook it up to a webcam, and then send the images over WiFi. At the tradeoff of a bit more latency, we can build a prototype of the same DeepLens concept today, much cheaper.
So in today’s post, we’ll do just that. We’ll write a web server in Python to send images from a Raspberry Pi to another computer for inference, or image detection.
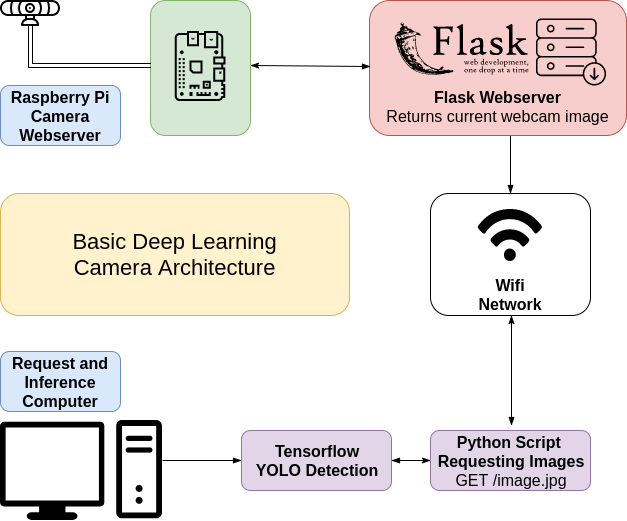
The other computer with more processing power will then use a neural network architecture called “YOLO” to do detection on that input image, and tell if there’s a bird in the camera frame.
We’ll start with the YOLO architecture, because it’s one of the fastest detection models around. And there is a port of its model to Tensorflow, which is very easy to install and get running on many different platforms. As a bonus, if you use the Tiny model we use in this post, you’ll also be able to do detection on a CPU, no expensive GPU needed.
Going back to our prototype. If there is a bird detected in the camera frame, we’ll save that image for later analyses.
This is just the beginning of a truly intelligent deep learning camera, and terribly basic, but you’ve got to start from somewhere. So let’s jump in, and get the first version of our prototype our the door.
Detection vs Imaging
As we’ve already said, the DeepLens’ imaging is built right into the computer. So it can do base level detection, and determine if the images coming in match your criteria or not with the onboard computational power.
But with something like a Raspberry Pi, we won’t necessarily have the computational power necessary to do onboard detection in real time. So instead, we’re going to use another computer to do the inference of what’s in the image.
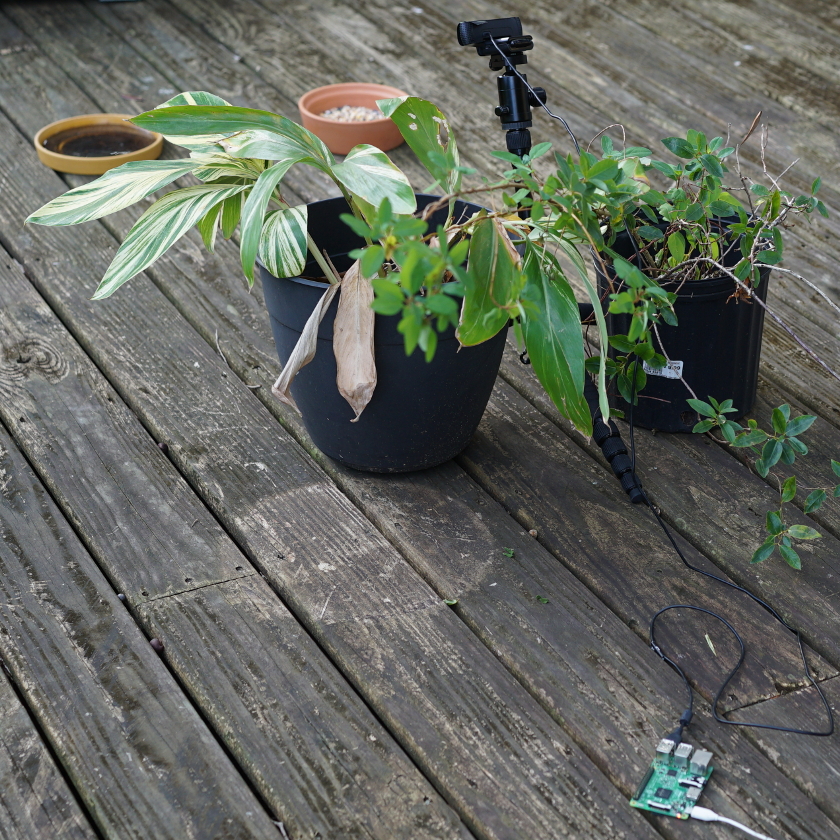
In my case, I used a base, simple Linux computer with a webcam and wifi access (Raspberry Pi 3 and a cheap webcam), to act a server for my deep learning machine to do inference from.
This is a good stack, because it allows for keeping many cheaper cameras in the wild, and doing all my computation in one place, on my desktop machine.
Webcam Image Server Stack
If you don’t want to use the Raspberry Pi camera, you can install OpenCV 3 on your Raspberry Pi using these instructions, although substitute OpenCV version 3.3.1 for 3.3.0 in the instructions to get the latest version installed locally.
As a sidenote, I had to disable CAROTENE compilation in order to get 3.3.1 on my Raspberry Pi. You may need to do the same.
Once that’s done, we just need to set up our web server in Flask, so we can load the images from the webcam.
I’ve used Miguel Grinberg’s excellent webcam server code as a starting place, and created just a simple jpg endpoint instead of a motion jpeg endpoint:
#!/usr/bin/env python
from importlib import import_module
import os
from flask import Flask, render_template, Response

# uncomment below to use Raspberry Pi camera instead
# from camera_pi import Camera

# comment this out if you're not using USB webcam
from camera_opencv import Camera

app = Flask(__name__)

@app.route('/')
def index():
    return "hello world!"

def gen2(camera):
    """Returns a single image frame"""
    frame = camera.get_frame()
    yield frame

@app.route('/image.jpg')
def image():
    """Returns a single current image for the webcam"""
    return Response(gen2(Camera()), mimetype='image/jpeg')

if __name__ == '__main__':
    app.run(host='0.0.0.0', threaded=True)
If you want to use the Raspberry Pi video camera, make sure you uncomment the from camera_pi line, and comment out the from camera_opencv line.
You can get this server running with just a python3 app.py, or using gunicorn, the same as is mentioned in Miguel’s post.
It just uses Miguel’s excellent camera management to turn off the camera when there aren’t requests coming in, and also manages threads, if we have more than one machine doing inference on the images coming in from the webcam.
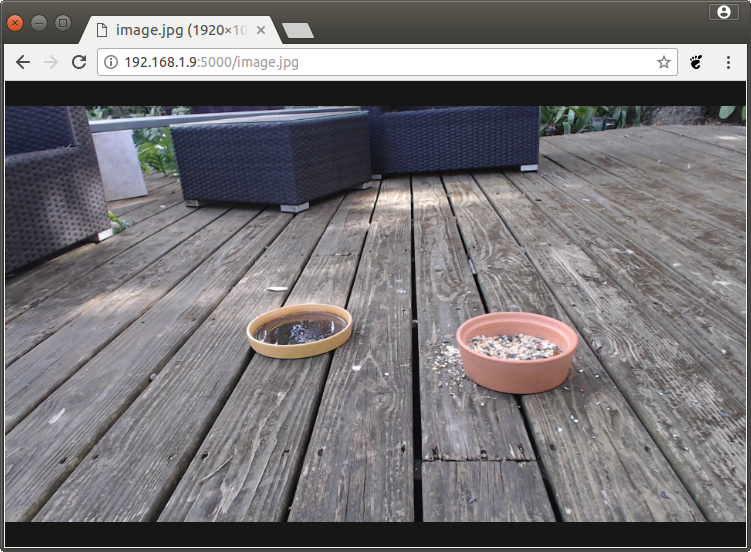
Once we’ve started it on our Raspberry Pi, we can test and make sure the server works by first discovering it’s IP address, and then attempting to reach it via our web browser.
The URL should be something like http://192.168.1.4:5000/image.jpg:
Pulling Images and Doing Inferences from the Camera Server
Now that we’ve got an endpoint to load the webcam’s current image from, we can build the script to grab and run inference on those images.
We’ll use requests, the great Python library for grabbing files from URLs, along with Darkflow, an implementation of the YOLO models on Tensorflow.
Unfortunately, there isn’t a pip wheel for installing Darkflow, so we’ll need to clone the repo, and then build and install it ourselves on the computer that will be doing our inferences.
After installing the Darkflow repo, we’ll also need to download the weights and model of a version of YOLO we’ll be using.
In my case, I used the YOLO v2 tiny network, as I wanted to run my inference on a slower computer, using the onboard CPU, not the GPU in my main desktop. The tiny network comes with the tradeoff of less accuracy than the full YOLO v2 model.
With this built and downloaded, we’ll also need Pillow, numpy, and OpenCV installed on the detection computer.
Finally, we can finally write our code to run detection:
from darkflow.net.build import TFNet
import cv2

from io import BytesIO
import time
import requests
from PIL import Image
import numpy as np

options = {"model": "cfg/tiny-yolo-voc.cfg", "load": "bin/tiny-yolo-voc.weights", "threshold": 0.1}

tfnet = TFNet(options)

birdsSeen = 0
def handleBird():
    pass

while True:
    r = requests.get('http://192.168.1.11:5000/image.jpg') # a bird yo
    curr_img = Image.open(BytesIO(r.content))
    curr_img_cv2 = cv2.cvtColor(np.array(curr_img), cv2.COLOR_RGB2BGR)

    result = tfnet.return_predict(curr_img_cv2)
    print(result)
    for detection in result:
        if detection['label'] == 'bird':
            print("bird detected")
            birdsSeen += 1
            curr_img.save('birds/%i.jpg' % birdsSeen)
    print('running again')
    time.sleep(4)
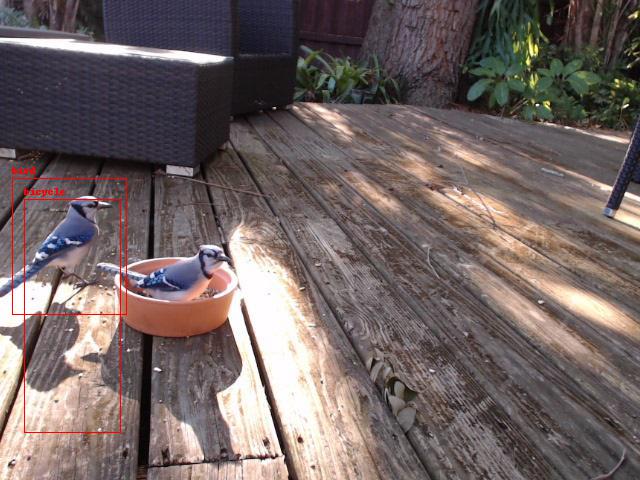
With this, we have a very basic first version of our detection running. We can see in the console for our Raspberry Pi what’s being detected, and we can also see each of the birds being seen saved on to our hard drive.
Later, we can run a program to do labeling on the images YOLO has detected birds in.
Balance: More False Positives or More False Negatives?
One thing to take note of, our threshold key in the options dictionary we created.
This threshold says what confidence level we need to have at a minimum to say we’ve detected what we’re looking for.
For testing purposes, I’ve set it to be 0.1. But this low of a threshold will give us a lot of false positives. Worse still, the Tiny YOLO model we’ve used for detection is less accurate than the real YOLO model, and so we’ll have a fair bit of wrong detections.
Lowering or raising the threshold can improve or lower the total output of your model, depending on what you’re trying to build. In my case, I’m fine with more false positives, but I really prefer to get more images of birds than less. You may need to tweak these parameters to match your needs.
Waiting for the Birds
Getting birds into my bird feeder took a long time. I figured I’d have birds in the backyard for my feeder within hours of putting out food.
Instead, it took a few days. Squirrels kept eating the food I’d left out, and it seemed for the first few days I hardly saw a bird in the sky at all.
Finally, I broke down and got a second bird feeder, one that was a bit more visible and off the ground. With this, I finally started getting some images like the ones at the beginning of the post.
Where to Go from Here
The code for this post is available at Github, as always.
Because so much of this post itself was just combining other previous work, there isn’t really much to it. A huge debt is owed to both Miguel Grinberg’s Flask streaming video example, and to Darkflow and Darknet for the deep learning models used for detection.
This post is the beginning of a set of lessons where I will use deep learning cameras to try and interact with birds.
If you’re interested in following along, I encourage you to subscribe below, or create an account here on Make Art with Python.
Finally, feel free to share this post with your friends. It helps me to continue making these sort of tutorials.
