Creating Automatic Gifs with Mask R-CNN
In previous posts, we used deep learning to automatically detect and record birds from a webcam. Specifically, we used a deep learning model called “YOLO”.
Today, we’ll use a new deep learning model, called Mask R-CNN to extract object gifs automatically from video.
There’s been a few versions of the Mask R-CNN paper implemented, but lately I’ve been playing with the MatterPort version. It works with Python 3, it’s got great example code, and it’s probably the easiest version to install.
First, Start with the Right Input
To begin with my automatic gif generator, I’ve opted to do the most stupid thing first, a pattern I’ve found works well in creative coding projects.
Rather than begin by trying to detect and track multiple people for a gif creator, first start with an input video with just one human.
That way we can isolate and see how well our model can mask for a single individual. We’ll be able to see when the human gets lost, and how noisey the detection outline model really is.
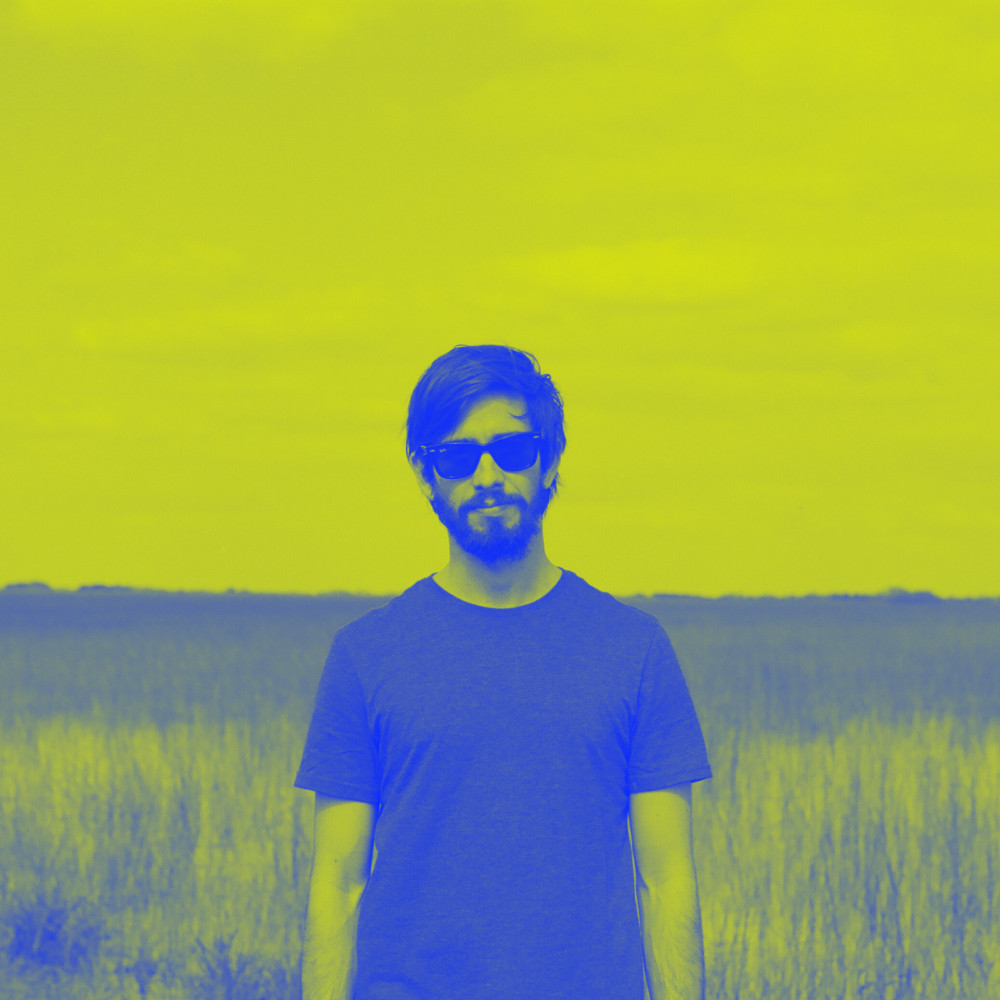
So for that, we’ll use this video I recorded of myself walking around in our back yard.
Working with Video in Python
Although there are a few great options for working with video in Python, I prefer to convert my videos directly into image sequences and back again using ffmpeg.
With the following command, we get a sequence of images out from an input video. Depending on your video input source, it may be between 24 and 60 frames per second. You’ll need to keep track of your input video’s frames per second in order to keep things synced up after conversion.
$ ffmpeg -i FILENAME.mp4 -qscale:v 2 %05d.jpg
This creates a 5 digit, zero padded sequence of images. If your input video is longer than 5 digits, you can change the %05d to %09d instead.
The number sequence with be as long as your video’s duration in seconds, times the number of frames per second.
So a three second video, 24fps video will be 3 * 24, or 72 frames.
From here, we’ve got a series of still images to import using our static Mask R-CNN code.
Once we’ve finished editing our images, we can later put them back together into a video again with a command like this:
$ ffmpeg -r 60 -f image2 -i %05d.jpg OUTPUT.mp4
The -r parameter specifies the frames per second we want to use to build our output video. We can set this lower if we want to slow down or video, or higher if we want to speed it up.
With that in order, let’s jump into detecting and manipulating our images with Mask R-CNN.
Detecting and Masking Images
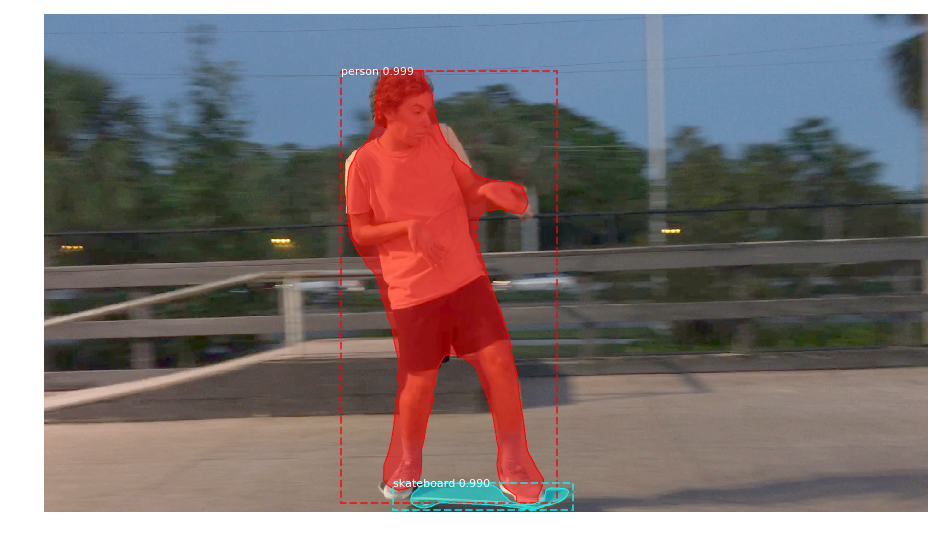
The Matterport Mask R-CNN comes with a few great Jupyter notebooks that help explore how it works.
Once you get the repo set up locally, I recommend running through the demo notebook, and exploring how the images and detection masks work.
In general, the masks are unsigned 8 bit integers, in the shape of your input image. Each mask is 0, or black where there is no detected object, and 255 or white, where there is a detected object.
In order to do something with the mask, you’ll need to use it as a channel to copy or paste another image into it.
Something like the following code lets us extract just a transparent cutout of a person from each of our video’s images:
import numpy as np
import os
import coco
import model as modellib
import glob

import imageio
import cv2

# Root directory to project
ROOT_DIR = os.getcwd()

# Directory to save logs and trained model
MODEL_DIR = os.path.join(ROOT_DIR, "logs")

# Path to trained weights file
# Download this file and place in the root of your
# project (See README file for details)
COCO_MODEL_PATH = os.path.join(ROOT_DIR, "mask_rcnn_coco.h5")

class InferenceConfig(coco.CocoConfig):
    # Set batch size to 1 since we'll be running inference on
    # one image at a time. Batch size = GPU_COUNT * IMAGES_PER_GPU
    GPU_COUNT = 1
    IMAGES_PER_GPU = 1

config = InferenceConfig()

# Create model object in inference mode.
model = modellib.MaskRCNN(mode="inference", model_dir=MODEL_DIR, config=config)

# Load weights trained on MS-COCO
model.load_weights(COCO_MODEL_PATH, by_name=True)

class_names = ['BG', 'person', 'bicycle', 'car', 'motorcycle', 'airplane',
               'bus', 'train', 'truck', 'boat', 'traffic light',
               'fire hydrant', 'stop sign', 'parking meter', 'bench', 'bird',
               'cat', 'dog', 'horse', 'sheep', 'cow', 'elephant', 'bear',
               'zebra', 'giraffe', 'backpack', 'umbrella', 'handbag', 'tie',
               'suitcase', 'frisbee', 'skis', 'snowboard', 'sports ball',
               'kite', 'baseball bat', 'baseball glove', 'skateboard',
               'surfboard', 'tennis racket', 'bottle', 'wine glass', 'cup',
               'fork', 'knife', 'spoon', 'bowl', 'banana', 'apple',
               'sandwich', 'orange', 'broccoli', 'carrot', 'hot dog', 'pizza',
               'donut', 'cake', 'chair', 'couch', 'potted plant', 'bed',
               'dining table', 'toilet', 'tv', 'laptop', 'mouse', 'remote',
               'keyboard', 'cell phone', 'microwave', 'oven', 'toaster',
               'sink', 'refrigerator', 'book', 'clock', 'vase', 'scissors',
               'teddy bear', 'hair drier', 'toothbrush']

numFiles = len(glob.glob('extractGif/*.jpg'))
counter = 0

for i in range(1, numFiles):
    filename = 'extractGif/%05d.jpg' % i
    print("doing frame %s" % filename)
    frame = cv2.imread(filename)

    results = model.detect([frame], verbose=0)
    r = results[0]
    masky = np.zeros((frame.shape[0], frame.shape[1]), dtype='uint8')
    humans = []
    if r['rois'].shape[0] >= 1:
        for b in range(r['rois'].shape[0]):
            if r['class_ids'][b] == class_names.index('person'):
                masky += r['masks'][:,:,b] * 255
                humansM = r['masks'][:,:,b] * 255
                y1, x1, y2, x2 = r['rois'][b]
                humansCut = frame[y1:y2, x1:x2]
                humansCut = cv2.cvtColor(humansCut.astype(np.uint8), cv2.COLOR_BGR2RGBA)
                humansCut[:,:,3] = humansM[y1:y2, x1:x2]
                humans.append(humansCut)

    if len(humans) >= 1:
        counter += 1

    for j, human in enumerate(humans):
        fileout = 'giffer%i/%05d.png' % (j, counter)
        if not os.path.exists('giffer%i' % j):
            os.makedirs('giffer%i' % j)
        print(fileout)
        #frame = cv2.cvtColor(frame.astype('uint8'), cv2.COLOR_BGRA2BGR)
        imageio.imwrite(fileout, human)
Of particular significance is the class_names variable. This holds each of the different types of things we can detect using the COCO dataset. So just change the line if r[class_ids][b] == class_names.index('person') to the name of anything else in this list, and you get the masked out versions of those things from your video.
Converting Our Image Sequence to a Gif
Now that we’ve got a set of transparent images, we can open our transparent PNGs and see what they look like.
In my case, they’re kinda glitchy. The mask really isn’t perfect, but it makes for an interesting effect.
If we wanted to, we could just join them all together now, into a single gif with ffmpeg all over again. We’d just need to finding the maximum width and height of the image sequence, and then paste that into a new image sequence to be fed into ffmpeg:
import glob
from PIL import Image

maxW = 0
maxH = 0

DIRECTORY = 'wave-input'

numFiles = len(glob.glob(DIRECTORY + '/*.png'))

for num in range(numFiles - 1):
    im = Image.open(DIRECTORY + '/%05d.png' % (num + 1))
    if im.width > maxW:
        maxW = im.width
    if im.height > maxH:
        maxH = im.height

for num in range(numFiles - 1):
    each_image = Image.new("RGBA", (maxW, maxH))
    im = Image.open(DIRECTORY + '/%05d.png' % (num + 1))
    each_image.paste(im, (0,0))
    each_image.save('gifready/%05d.png' % num)
This code opens up our giffer0 directory, and then iterates over all the images, looking for the width and height of the largest images. It then exports all of these into a new directory (gifready), where we can then put it all back together into a gif.
Here I used Imagemagick to generate a gif:
$ convert -dispose Background *.png outty.gif
But just generating an empty gif from videos automatically isn’t super exciting, so let’s see what else is possible with a little remixing…
Using Our Extracted Gifs in Pygame / Video
Lately, I’ve been using these extracted image sequences directly in Pygame.
I don’t bother to convert them to gifs, and instead keep them as raw PNG image sequences.
I’ve created a tiny creative programming environment, where I have a setup and a draw function, and use my image sequences as input to that.
Using this setup, I can play around with my image sequences, scaling, rotating, and glitching them.
Here’s the code from the intro, placing them across the screen, evenly spaced.
import pygame
import random
import time
import math
import os
import glob

imageseq = []

def setup(screen, etc):
    global imageseq
    numIn = len(glob.glob('wave-input/*.png'))
    for i in range(numIn):
            if os.path.exists('wave-input/%05d.png' % (i + 1)):
                imagey = pygame.image.load('wave-input/%05d.png' % (i + 1)).convert_alpha()
                imageseq.append(imagey)

counter = 1

def draw(screen, etc):
    # our current animation loop frame
    global counter
    current0 = imageseq[counter % len(imageseq)]
    counter += 1

    for i in range(0, 1920, 200):
        screen.blit(current0, (i, 1080 // 2 - 230))
It loads each of the images in a directory into an alpha pygame.surface. Each of these are added to a list, and then we can blit or draw each image to the screen, one by one in our loop.
This is just the basic setup, some of my more advanced sketches involve drawing the gifs in circle shapes, as seen above.
If you’re interested in creating these sort of effects, check out my daily sketches.
Glitching Input Video with Extracted Masks
To generate the above effect, I kept track of the previous n frames of video, and where my person and skateboard was with a list.
I then pasted each of the previous images right on top of one another, and then finished by pasting the final image frame.
Besides this, I also experimented with blending other videos with my masks. Here I mixed a skateboarder with a video of outer space:
I stepped through each frame of the space and skateboarder at the same time, and then masked out the frame of space, pasting on top of the skater video.
The code for this is also in one of my daily sketches.
Where to Go From Here
We’re really just beginning to explore what’s possible artistically with new deep learning models.
There’s also OpenPose, a model to predict a person’s full orientation. And it seems extremely robust.
I plan on incorporating OpenPose in upcoming sketches, to create some Cyriak like glitchy humans.
(He’s the creator of the gif you see above. Check him out, he’s insanely good.)
All the code mentioned in this article is available on Github, and I appreciate any and all pull requests / improvements. I also enjoy seeing what other people make.
If you’re still learning Python and Pygame, or you want a visual introduction to programming, check out my book, Make Art with Python. The first three chapters are free.
Finally, feel free to share this post with your friends. It helps me to continue making these sort of tutorials.
