Building a Snapchat Lens Effect in Python
Snapchat, Instagram, and now Apple have all gotten in on the real time face effects.
In today’s post, we’ll build out a method to track and distort our face in real time, just like these apps do.
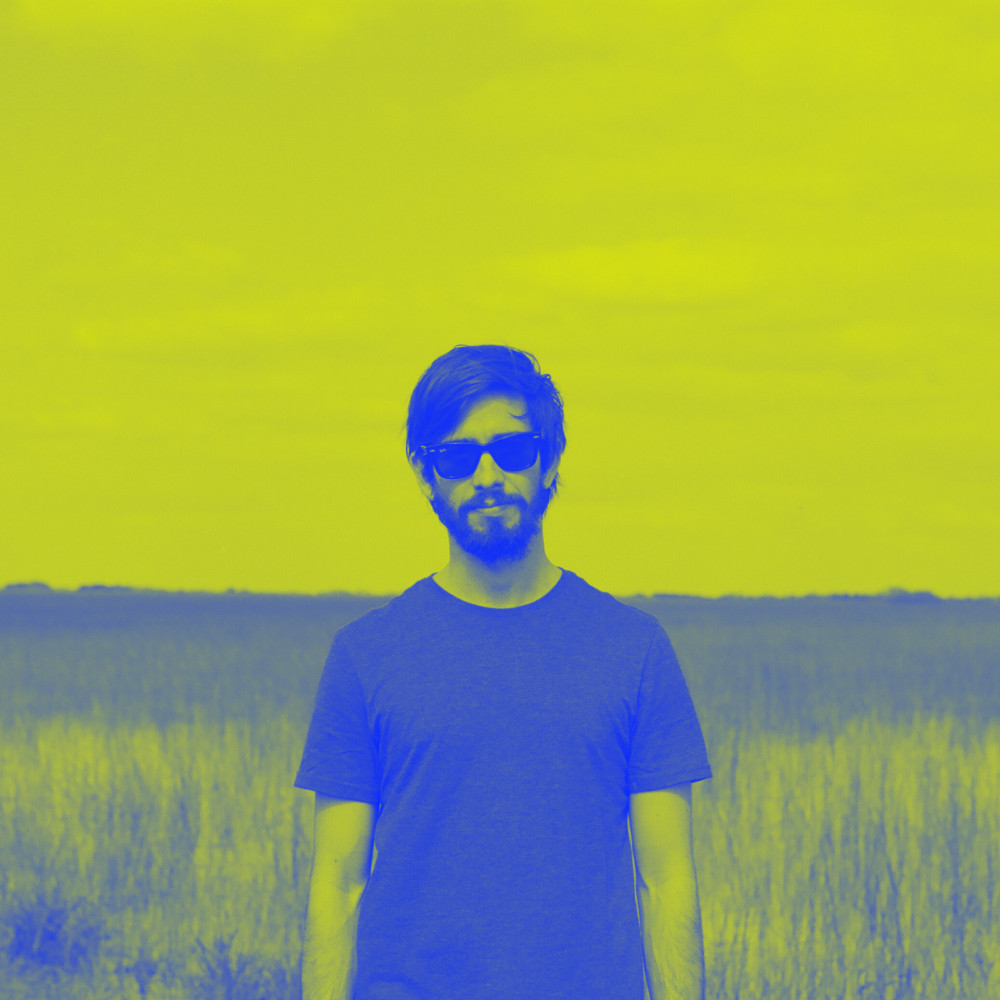
We’ll end up with something like this:
For those who’d like a video walkthrough, this entire post is also available as a walkthrough on YouTube. You can find the video walkthrough at the end of this page.
The Tools of Face Detection in Python

We’ll use two of the biggest, most exciting image processing libraries available for Python 3, Dlib and OpenCV.
Installing Dlib is easy enough, thanks to wheels being available for most platforms. Just a simple pip install dlib should be enough to get you up and running.
For OpenCV, however, installation is a bit more complicated. If you’re running on MacOS, you can try this post to get OpenCV setup. Otherwise, you’ll need to figure out installation on your own platform.
Something like this might work for Ubuntu.
For Windows users, you may want to try your luck with this unofficial wheel.
Once you’ve gotten OpenCV installed, you should be set for the rest of this lesson.
Architecture of Lens Effects
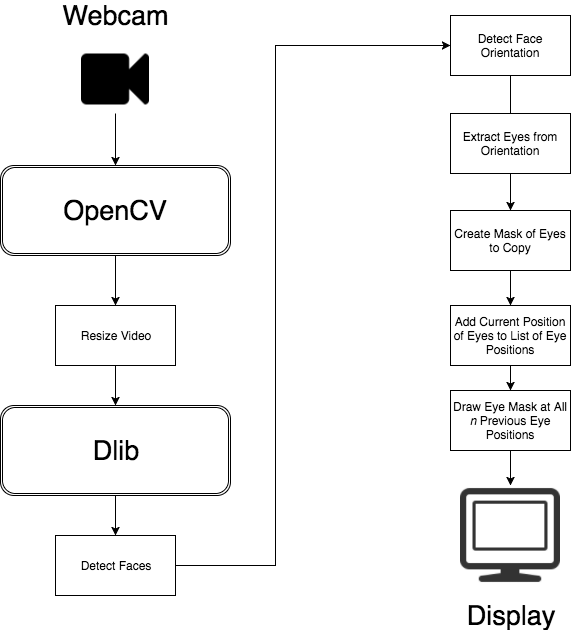
We’ll use OpenCV to get a raw video stream from the webcam. We’ll then resize this raw stream, using the imutils resize function, so we get a decent frame rate for face detection.
Once we’ve got a decent frame rate, we’ll convert our webcam image frame to black and white, then pass it to Dlib for face detection.
Dlib’s get_frontal_face_detector returns a set of bounding rectangles for each detected face an image. With this, we can then use a model (in this case, the shape_predictor_68_face_landmarks on Github), and get back a set of 68 points with our face’s orientation.
From the points that match the eyes, we can create a polygon matching their shape in a new channel.
With this, we can do a bitwise_and, and copy just our eyes from the frame.
We then create an object to track the n positions our eyes have been. OpenCV’s boundingRect function gives us a base x and y coordinate to draw from.
Finally, create a mask to build up all the previous places where our eyes where, and then once more, bitwise_and copy our previous eye image into the frame before showing.
Writing the Code
With our concepts laid out, writing our actual eye detection and manipulation is straight forward.
import argparse

import cv2
from imutils.video import VideoStream
from imutils import face_utils, translate, resize

import time
import dlib

import numpy as np

parser = argparse.ArgumentParser()
parser.add_argument("-predictor", required=True, help="path to predictor")
args = parser.parse_args()

print("starting program.")
print("'s' starts drawing eyes.")
print("'r' to toggle recording image, and 'q' to quit")

vs = VideoStream().start()
time.sleep(1.5)

# this detects our face
detector = dlib.get_frontal_face_detector()
# and this predicts our face's orientation
predictor = dlib.shape_predictor(args.predictor)

recording = False
counter = 0

class EyeList(object):
    def __init__(self, length):
        self.length = length
        self.eyes = []

    def push(self, newcoords):
        if len(self.eyes) < self.length:
            self.eyes.append(newcoords)
        else:
            self.eyes.pop(0)
            self.eyes.append(newcoords)

    def clear(self):
        self.eyes = []

# start with 10 previous eye positions
eyelist = EyeList(10)
eyeSnake = False

# get our first frame outside of loop, so we can see how our
# webcame resized itself, and it's resolution w/ np.shape
frame = vs.read()
frame = resize(frame, width=800)

eyelayer = np.zeros(frame.shape, dtype='uint8')
eyemask = eyelayer.copy()
eyemask = cv2.cvtColor(eyemask, cv2.COLOR_BGR2GRAY)
translated = np.zeros(frame.shape, dtype='uint8')
translated_mask = eyemask.copy()

while True:
    # read a frame from webcam, resize to be smaller
    frame = vs.read()
    frame = resize(frame, width=800)

    # fill our masks and frames with 0 (black) on every draw loop
    eyelayer.fill(0)
    eyemask.fill(0)
    translated.fill(0)
    translated_mask.fill(0)

    # the detector and predictor expect a grayscale image
    gray = cv2.cvtColor(frame, cv2.COLOR_BGR2GRAY)
    rects = detector(gray, 0)

    # if we're running the eyesnake loop (press 's' while running to enable)
    if eyeSnake:
        for rect in rects:
            # the predictor is our 68 point model we loaded
            shape = predictor(gray, rect)
            shape = face_utils.shape_to_np(shape)

            # our dlib model returns 68 points that make up a face.
            # the left eye is the 36th point through the 42nd. the right
            # eye is the 42nd point through the 48th.
            leftEye = shape[36:42]
            rightEye = shape[42:48]

            # fill our mask in the shape of our eyes
            cv2.fillPoly(eyemask, [leftEye], 255)
            cv2.fillPoly(eyemask, [rightEye], 255)

            # copy the image from the frame onto the eyelayer using that mask
            eyelayer = cv2.bitwise_and(frame, frame, mask=eyemask)

            # we use this to get an x and y coordinate for the pasting of eyes
            x, y, w, h = cv2.boundingRect(eyemask)

            # push this onto our list
            eyelist.push([x, y])

            # finally, draw our eyes, in reverse order
            for i in reversed(eyelist.eyes):
                # first, translate the eyelayer with just the eyes
                translated1 = translate(eyelayer, i[0] - x, i[1] - y)
                # next, translate its mask
                translated1_mask = translate(eyemask, i[0] - x, i[1] - y)
                # add it to the existing translated eyes mask (not actual add because of
                # risk of overflow)
                translated_mask = np.maximum(translated_mask, translated1_mask)
                # cut out the new translated mask
                translated = cv2.bitwise_and(translated, translated, mask=255 - translated1_mask)
                # paste in the newly translated eye position
                translated += translated1
        # again, cut out the translated mask
        frame = cv2.bitwise_and(frame, frame, mask=255 - translated_mask)
        # and paste in the translated eye image
        frame += translated

    # display the current frame, and check to see if user pressed a key
    cv2.imshow("eye glitch", frame)
    key = cv2.waitKey(1) & 0xFF

    if recording:
        # create a directory called "image_seq", and we'll be able to create gifs in ffmpeg
        # from image sequences
        cv2.imwrite("image_seq/%05d.png" % counter, frame)
        counter += 1

    if key == ord("q"):
        break

    if key == ord("s"):
        eyeSnake = not eyeSnake
        eyelist.clear()

    if key == ord("r"):
        recording = not recording

cv2.destroyAllWindows()
vs.stop()
Running the Code
To run this code, we’ll need to download the dlib 68 point predictor. We can download it, then extract it into our directory where we’ve got our Python program saved. From there we can just do a:
$ python3 eye-glitch.py -predictor shape_predictor_68_face_landmarks.dat
And we should get our frame running. From there, a pressing ‘s’ in our frame toggles our eye-snake effect, and ‘r’ allows us to record the frames to disk, for saving as a movie later. If you want to do that, you’ll need to first create a directory called image_seq in the same directory as your Python program.
Video Walkthrough / Github Code
As usual, the code is available on Github.
You can also view a walkthough of building the code, step by step in the following videos:
And Part 2:
Where to Go From Here
If you enjoyed this post, and would like to see more creative programming posts, I recommend subscribing to my newsletter. I’d also appreciate you sharing this post on your social media.
Finally, if you’re interested in learning software development, or you know somebody who is, I’ve written a book called Make Art with Python, and it will be available for purchase here soon.
For now, you can sign up as a user on this site, and get access to the first three chapters, along with a video walk through for each chapter, just like on this page.
