Automatic Memes in Python with Face Detection
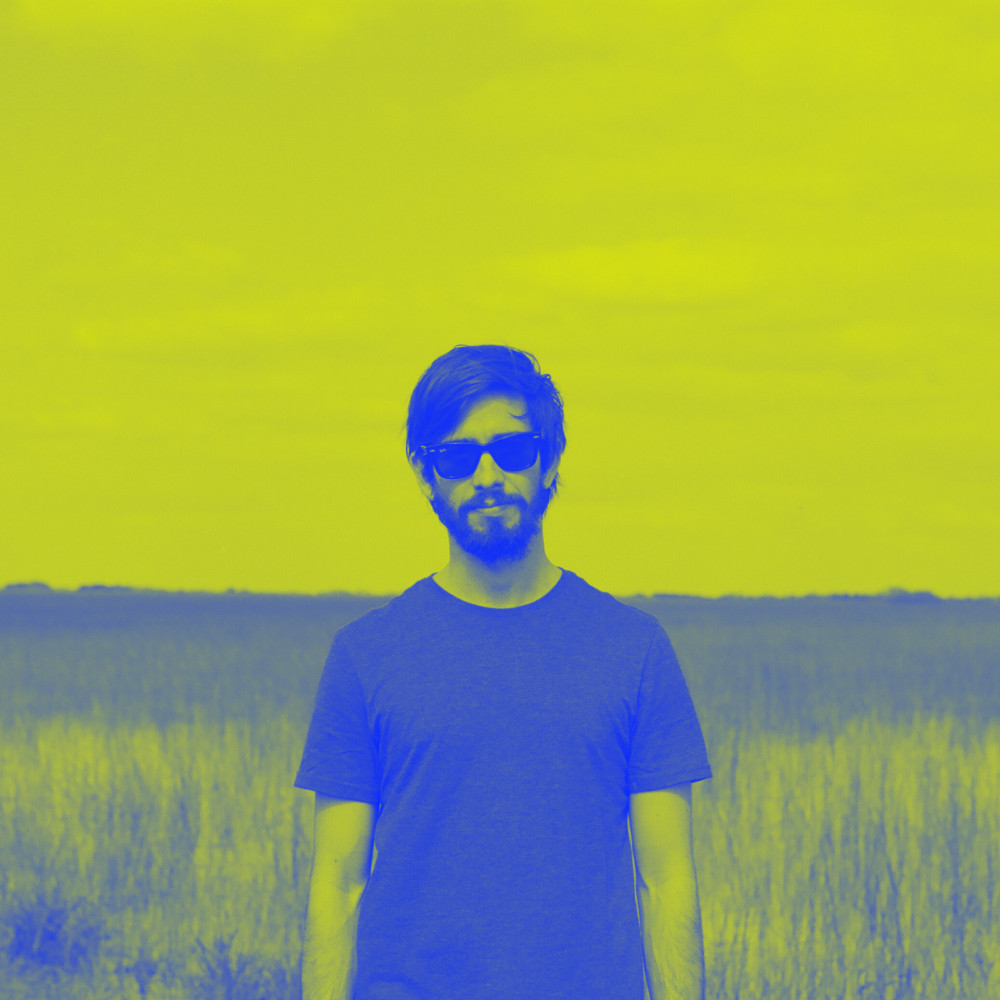
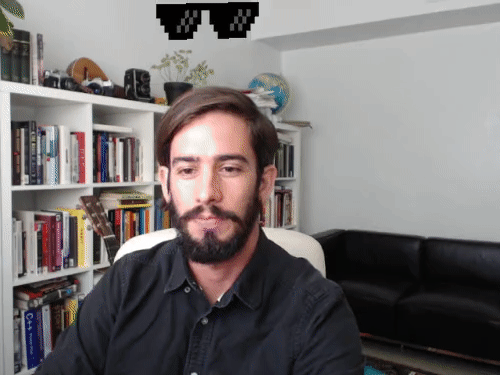
DEAL WITH IT is a meme where glasses fly in from off the screen, and on to a user’s face. The best instances of this meme do so in a unique way.
Today we’ll write an automatic meme generator, using any static image with faces as our input. This code makes a great starting point for a meme API, or building your own animated version using video input.
I got the idea for this post from Erik Taheri, and his in browser Javscript version of this effect.
At the end of the article as a bonus, I’ve also included a version where the effect can be done in real time from a webcam, using OpenCV.
The Tools of Face Detection and Gif Creation
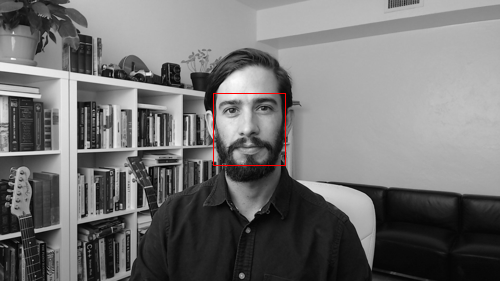
We’ll use Dlib’s get_frontal_face_detector, along with the 68 point shape prediction model we used in the Snapchat Lens article.
Our program will take in a command line argument, the input image. It will then use the face detection algorithm in Dlib to see if there are any faces. If there are, it will create an end position for each face, where the glasses should end up.
We’ll need to then scale and rotate our glasses to fit each person’s face. We’ll use the set of points returned from Dlib’s 68 point model to find a center of mass for the eyes, and a rotation for the space between them.
After we’ve found a final position and rotation for the glasses, we can then animate a gif, with the glasses coming in from the top of the screen. We’ll draw this using MoviePy and a make_frame function.
Architecture of Automatic Gifs
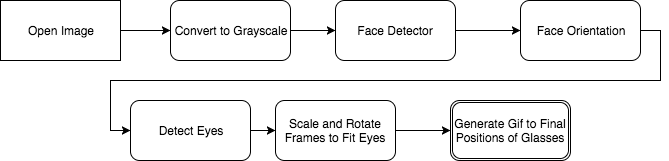
The architecture of the application is fairly straightforward. We first take in an image, and then convert it to a grayscale NumPy array. Once we’ve got that, we can then pass our detected faces into our face orientation prediction model.
With the returned orientation of the face, we can then select out the eyes, and scale and rotate our glasses frames to fit the person’s face.
We can accumulate a set of faces and their final positions, appending them to a list.
Finally, with this list we can then create a draw routine using MoviePy that then generates our animated gif.
Writing the Code
With our code architecture planned out, the next thing we need to do is build our code step by step.
We’ll first import all our tools, and take in an image from the command line:
import dlib
from PIL import Image
import argparse

from imutils import face_utils
import numpy as np

import moviepy.editor as mpy

parser = argparse.ArgumentParser()
parser.add_argument("-image", required=True, help="path to input image")
args = parser.parse_args()
With this in place, we can then resize our images to fit a smaller width, so our gifs don’t turn out massive, and import our face detector and shape predictors.
We can also open the glasses and text we’ll be pasting on to our image.
At this point, we should also detect if there are even any faces detected in the image. If not, we should exit immediately.
detector = dlib.get_frontal_face_detector()
predictor = dlib.shape_predictor('shape_predictor_68.dat')

# resize to a max_width to keep gif size small
max_width = 500

# open our image, convert to rgba
img = Image.open(args.image).convert('RGBA')

# two images we'll need, glasses and deal with it text
deal = Image.open("deals.png")
text = Image.open('text.png')

if img.size[0] > max_width:
    scaled_height = int(max_width * img.size[1] / img.size[0])
    img.thumbnail((max_width, scaled_height))

img_gray = np.array(img.convert('L')) # need grayscale for dlib face detection

rects = detector(img_gray, 0)

if len(rects) == 0:
    print("No faces found, exiting.")
    exit()

print("%i faces found in source image. processing into gif now." % len(rects))
Great! Now we can loop over each of the faces detected, and build up a list of scaled and rotated glasses, along with their final positions.
faces = []

for rect in rects:
    face = {}
    print(rect.top(), rect.right(), rect.bottom(), rect.left())
    shades_width = rect.right() - rect.left()

    # predictor used to detect orientation in place where current face is
    shape = predictor(img_gray, rect)
    shape = face_utils.shape_to_np(shape)

    # grab the outlines of each eye from the input image
    leftEye = shape[36:42]
    rightEye = shape[42:48]

    # compute the center of mass for each eye
    leftEyeCenter = leftEye.mean(axis=0).astype("int")
    rightEyeCenter = rightEye.mean(axis=0).astype("int")

    # compute the angle between the eye centroids
    dY = leftEyeCenter[1] - rightEyeCenter[1]
    dX = leftEyeCenter[0] - rightEyeCenter[0]
    angle = np.rad2deg(np.arctan2(dY, dX))

    # resize glasses to fit face width
    current_deal = deal.resize((shades_width, int(shades_width * deal.size[1] / deal.size[0])),
                               resample=Image.LANCZOS)
    # rotate and flip to fit eye centers
    current_deal = current_deal.rotate(angle, expand=True)
    current_deal = current_deal.transpose(Image.FLIP_TOP_BOTTOM)

    # add the scaled image to a list, shift the final position to the
    # left of the leftmost eye
    face['glasses_image'] = current_deal
    left_eye_x = leftEye[0,0] - shades_width // 4
    left_eye_y = leftEye[0,1] - shades_width // 6
    face['final_pos'] = (left_eye_x, left_eye_y)
    faces.append(face)
With our final positions in place along with our scaled and rotated glasses, we can then put together our movie. We’ll set a duration for the whole gif, along with a time to stop the glasses coming down, so we can put the deal with it text on the screen.
# how long our gif should be
duration = 4

def make_frame(t):
    draw_img = img.convert('RGBA') # returns copy of original image

    if t == 0: # no glasses first image
        return np.asarray(draw_img)

    for face in faces:
        if t <= duration - 2: # leave 2 seconds for text
            current_x = int(face['final_pos'][0]) # start from proper x
            current_y = int(face['final_pos'][1] * t / (duration - 2)) # move to position w/ 2 secs to spare
            draw_img.paste(face['glasses_image'], (current_x, current_y) , face['glasses_image'])
        else: # draw the text for last 2 seconds
            draw_img.paste(face['glasses_image'], face['final_pos'], face['glasses_image'])
            draw_img.paste(text, (75, draw_img.height // 2 - 32), text)

    return np.asarray(draw_img)
You’ll notice I used an image for the text overlay, and not Pillow’s built in Text drawing functions. I did this because Pillow doesn’t have a built in Stroke function for text. Without the stroke, the text becomes illegible on brighter images.
Finally, we need to create a VideoClip object in MoviePy, and pass in our animation generating frame along with a fps.
animation = mpy.VideoClip(make_frame, duration=duration)
animation.write_gif("deal.gif", fps=4)
With this, we’re done!
Animating Memes In Real Time
Now that we’ve got a base set for generating our gifs, it isn’t too difficult to adapt our code to work with the webcam in real time.
Instead of loading our source image from the command line, we can use OpenCV as our source images, and keep track of the animations with a counter. The new code to do this is pretty straightforward, the real meat being:
        # I got lazy, didn't want to bother with transparent pngs in opencv
        # this is probably slower than it should be
        if dealing:
            if current_animation < glasses_on:
                current_y = int(current_animation / glasses_on * left_eye_y)
                img.paste(current_deal, (left_eye_x, current_y), current_deal)
            else:
                img.paste(current_deal, (left_eye_x, left_eye_y), current_deal)
                img.paste(text, (75, img.height // 2 - 32), text)

    if dealing:
        current_animation += 1
        if current_animation > animation_length:
            dealing = False
            current_animation = 0
        else:
            frame = cv2.cvtColor(np.asarray(img), cv2.COLOR_RGB2BGR)
   cv2.imshow("deal generator", frame)
   key = cv2.waitKey(1) & 0xFF
    if key == ord("q"):
        break

    if key == ord("d"):
        dealing = not dealing
This creates a counter, and steps through how many frames have progressed to keep track of time. Using this, we can then animate our glasses to their final position. We see if the user presses the d key, to deal with it, and when they do, we begin our animation.
You can read the rest of the code for this at Github.
Where To Go From Here
We’ve successfully built the very first part in a program that could be used as an API to generate memes automatically.
By hooking up our program to something like Flask, we could display a web page allowing for users to upload their own images, and get back fully complete memes.
With something like youtube-dl, we could have users paste in YouTube url videos to automatically generate memes.
In case you missed it, the code is available at Github.
If you’re interested in more projects like these, please sign up for my newsletter or create an account here on Make Art with Python. You’ll get the first three chapters of my new book free when you do, and you’ll help me continue making projects like these.
